In a previous post I mentioned that we only shop once a week and have a meal planning system that works for us. Many of you messaged me and said you would really like to hear how it works so today I will share step 1. I promise, it really is not a complicated system. I'm just breaking it down so that I don't have to write a really long post or scare anyone off with all the details. Baby steps people-if you aren't in the habit of meal planning then you need to give yourself a good month of trying and sticking to a plan to really see if it will work for you. What we will share is what works for us-it is in no way a one size fits all model so feel free to play with it and tweak it to your family's needs. Feel free to post questions and David and I, or the other people who are reading this can try and make suggestions. It takes a village!
Step 1: Make a list of what is happening during the coming week.
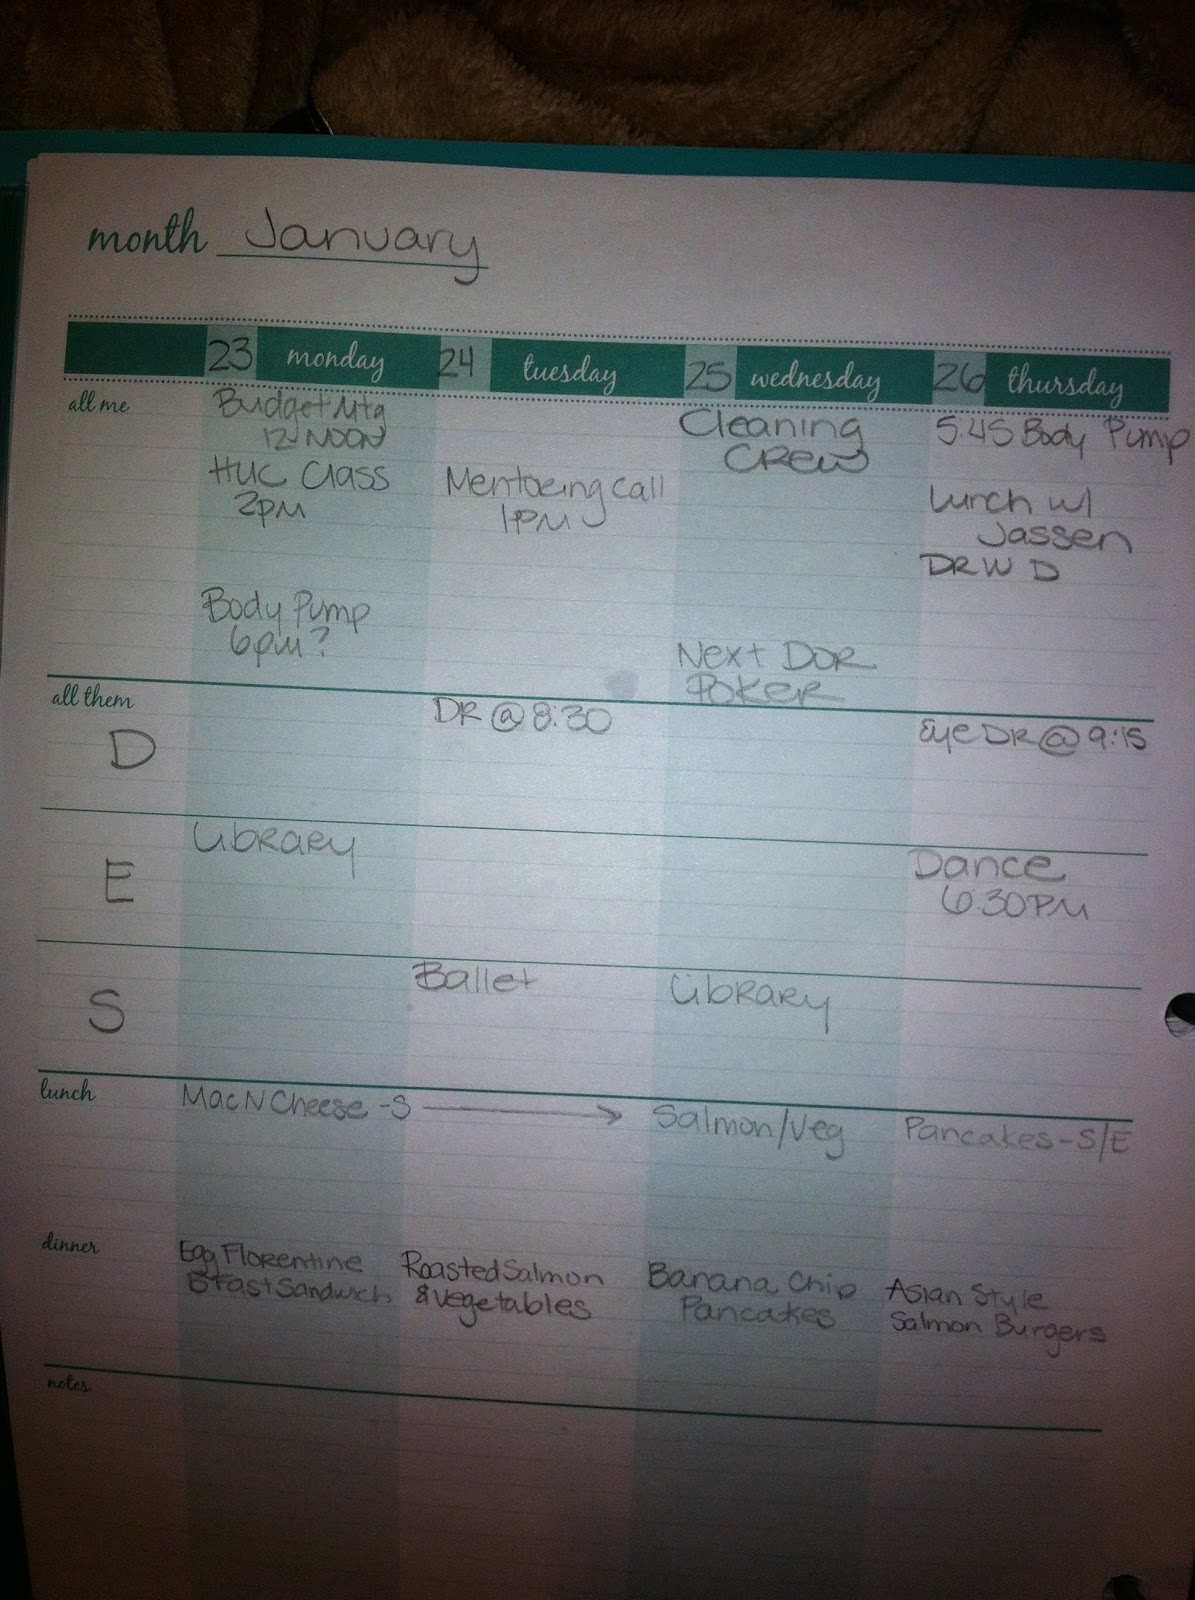
Our meal planning begins with knowing what is on the family calendar for the week. We usually shop on Sunday afternoons after everyone has napped so I start by grabbing my meal planning binder and putting in all the details for the week. What is this meal planning binder that I speak of? I originally started with a spreadsheet that I made myself on Excel with a 7x4 grid with squares for each day of the week going horizontally, and each meal plus a square for the events of note on that day. This worked great for years, but as our family grew, so did the events of note. Last year when I was wandering through Target I spotted a meal planning binder made by Mead that had all of this on pre-printed sheets in a 3 ring binder. It was on clearance so I snapped it up thinking it would be worth a try. It has been a great addition as I can always see the teal binder it came in even if it is buried under a pile and it provides a great place to store any recipes I may have printed out or have torn from one of my magazines. Mead has printable meal planning sheets for free but it seems the have discontinued the inserts for my binder. The closest one I could find on their website is this one: http://www.mead.com/images/mead/sub_images/OrgHer/Weekly_Meal_Planner.pdf
We like to cook out of one magazine or cookbook each week so that we don't have to hunt down a recipe when we are getting ready to cook. I grab whatever magazine or cookbook we are going to use for the week and flip through to see what recipes speak to me. Whenever I get one of my food magazines I go through it and dog ear every recipe that sounds good. I like to keep a big basket of our food magazines under a coffee table so they are always easy to find. We try and eat pretty healthfully so a lot of our recipes come from Cooking Light, Weight Watchers, and Everyday Food Magazine, or from this cookbook:
 I
IStep 3: Plan your recipes based on how much time you have.
READ ALL THE WAY THROUGH THE RECIPE YOU ARE CONSIDERING! This is a critical step so that you know how much time it is going to require, if you need to do a step the night before, and to see if you have all the tools it requires. I HATE getting stuck half way through a recipe and having to punt or make something else because I didn't do my homework. We pencil in the recipes we like and plan the dishes and side dishes on each square, look to see which will provide leftovers for the following day's lunch (one of my favorite time saving hints). Then I ask the kids what they want for lunch and make sure that is on the grid as well so that I make sure I have everything I need.
Step 4: Make a list and check it twice. (We'll get more specific about the tools we use for this in a future post.)
At this point I go through each recipe and make a list of all the items we need at the store. We don't plan out our breakfasts so this is the time we check our "stock" of breakfast & snack items. Our house doesn't have a pantry so we don't have a ton of space for food storage so we have to make sure and have the necessities on hand.
Step 5: Shop
We have found a store near us that is a great hybrid of traditional grocery store and gourmet market so we can usually get most of what we need in one stop. When Trader Joe's opens up around the corner from us in a few months we will have to see if they can take over for this store so that we don't have to make two stops. We do actually shop as a family. The kids LOVE checking off things on the grocery list and this has turned into a great letter/reading activity for the girls. We only shop for the things we need that week and rarely get swept up in the stock up on something that is on sale mentality. I know this works for a lot of people but we find we end up forgetting what we have and have to throw stuff away after it has gone bad. If it works for you-do it! Everyone has to find their own method.
Step 6: Enjoy a much more relaxed week!
Put your groceries away and enjoy your extra time now that your evenings aren't filled with trying to figure out what you can throw together or heading to the store multiple times in a week.
Step 7: Repeat!
Although this seems obvious, this is a critical step. Keeping up with this routine even when things get crazy can really make a huge difference in your sanity level.
A bit confused by all of this? Here's what my meal plan for next week looks like:
No comments:
Post a Comment